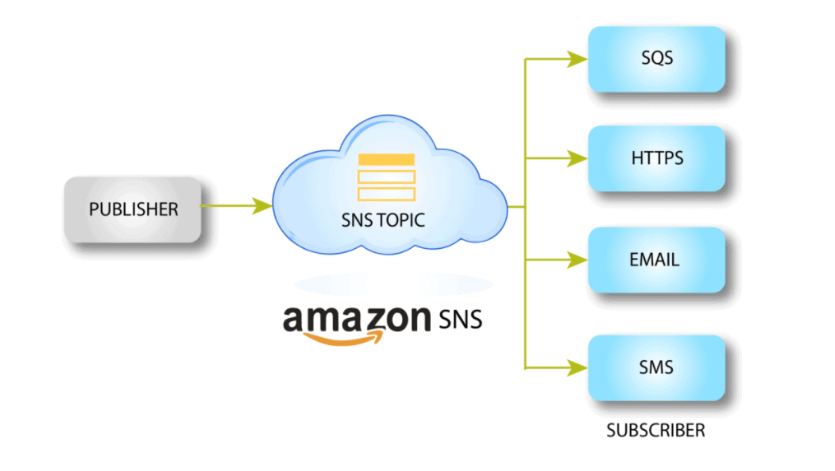
SNS stands for Simple Notification Service. AWS developed SNS as a fully managed service. It uses message delivery from the cloud to users via email, HTTPS, SMS, or other endpoints. In Amazon SNS, communication operates through a publish-subscribe (pub/sub) model. This means that instead of direct messaging between sender and receiver, publishers broadcast messages to topics, and subscribers receive messages from these topics. Its availability, durability, and security are well-known attributes of SNS. This blog will delve into more about Amazon Simple Notification Service (SNS), its benefits, and how to configure it .
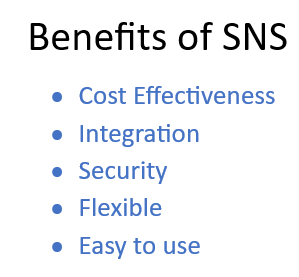
Benefits of Amazon Simple Notification Service (SNS)
Cost Effectiveness: Amazon SNS is cost-effective because it supports a pay-as-you-go pricing model. You only pay for what you use, and there are no upfront payments.
Integration : Amazon SNS can seamlessly integrate with various AWS services such as AWS Lambda, Amazon SQS, and Amazon S3.
Security: Using message encryption, SNS ensures that it protects the data during transit.
Flexible :Furthermore, it accommodates a range of endpoints including HTTP, SMS, email, Lambda and Amazon SQS.
Easy to use: Setting up and configuring Amazon SNS is easy to use.
Configuring AWS Simple Notification Service : Step-by-Step Guide
The following are steps to configure Amazon Simple Notification Service(SNS):
Step 1: Log in to the AWS Management Console using your account credentials.
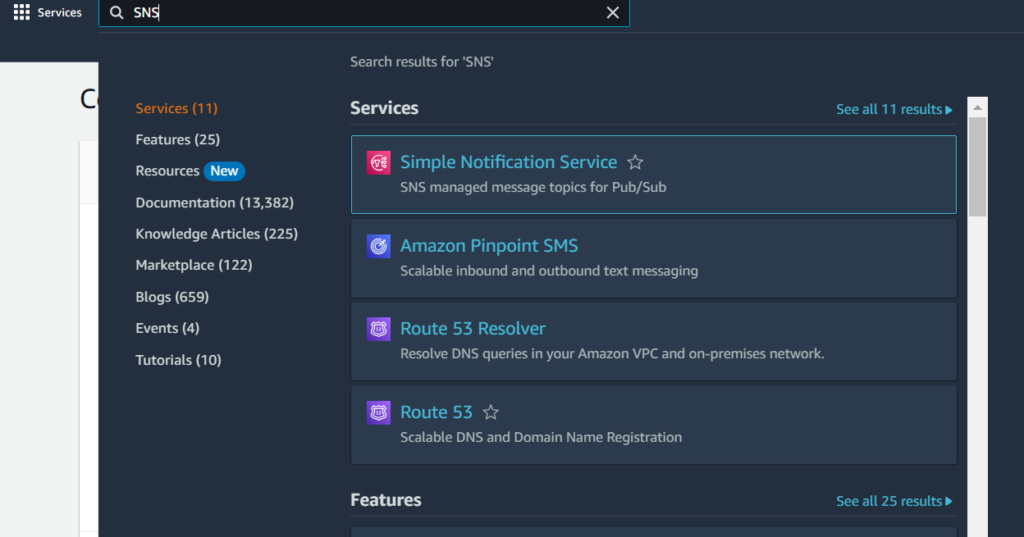
Step 2: Navigate to the search bar on the left-hand side, and search for “SNS”. Then select “Simple Notification Service” from the drop-down list of services.
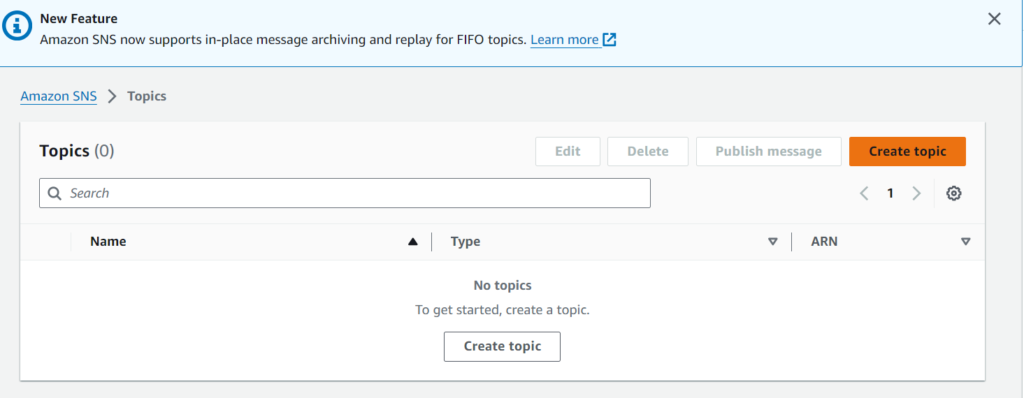
Step 3: Click on the “Topics” option on the left-hand side, and then click on the “Create Topic” option located on the right-hand side of the page to create a topic.
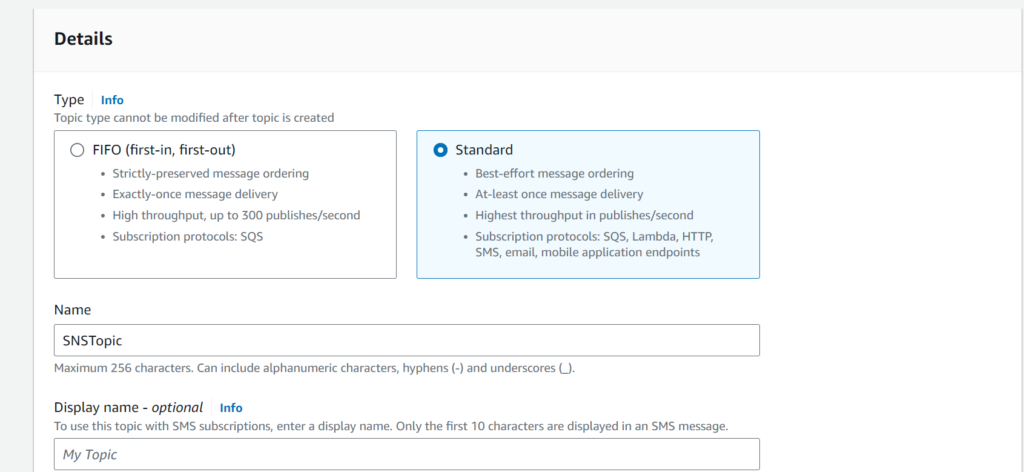
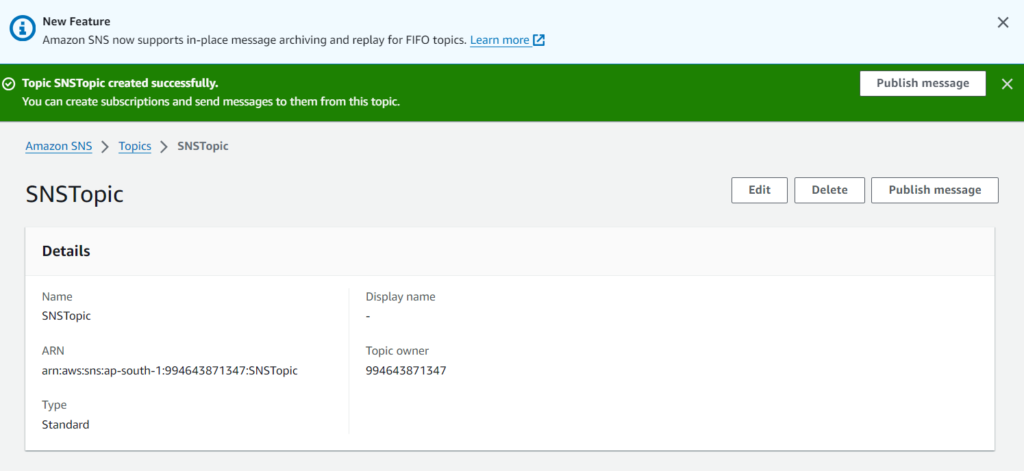
Step 4: Choose the “Type” of the topic as “FIFO” or “Standard”. By default, it is set to FIFO. However, here, we will select as “Standard”. Provide a “Name” for the topic, such as “SNSTopic”. Keep other options as default. Click on the “Create Topic” option to successfully create the topic. A message stating that the topic has been created successfully will appear. A message stating that the topic has been created successfully will appear.
How To create a subscription in Amazon SNS ?
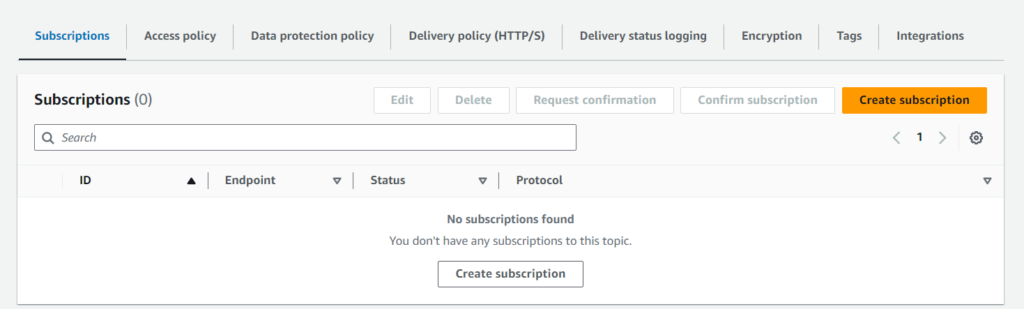
Step 5 : Click on “Create Subscription” at the bottom of the page to create a subscription.
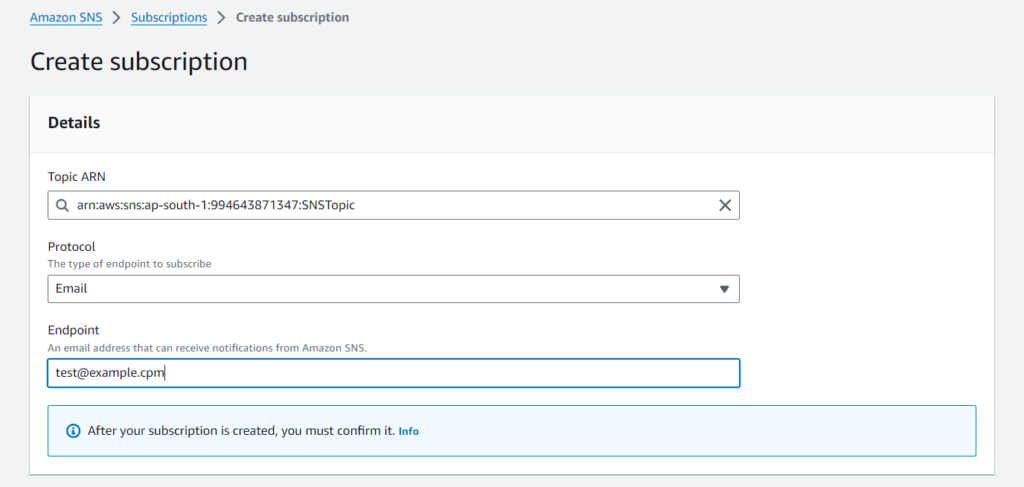
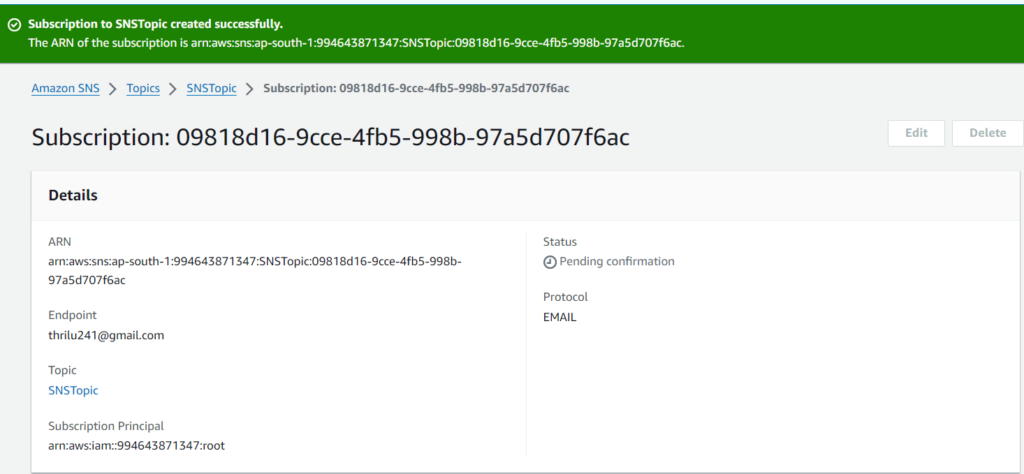
Step 6: Choose the “Protocol” as “Email“, provide the “Endpoint” as your email address, and then click on the “Create Subscription” option. You will see a confirmation message at the top of the page, indicating that the subscription has been successfully created.
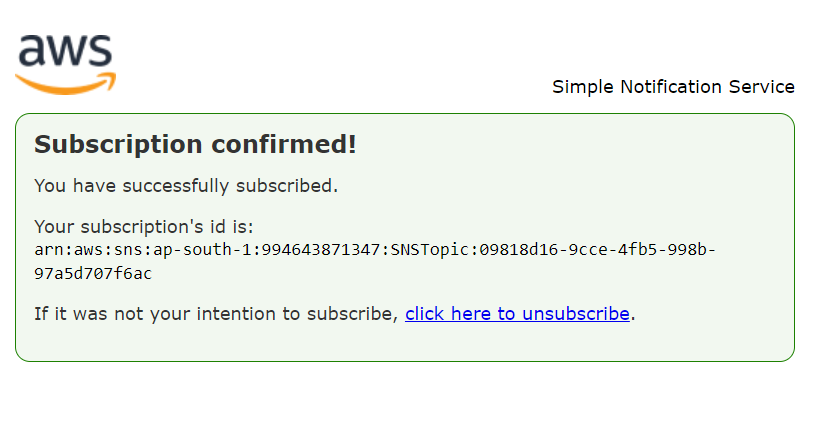
Step 7: This step involves checking your email for the subscription confirmation. Click on the confirmation link provided in the email.

Once you confirm the subscription, you will receive a confirmation message like the one below
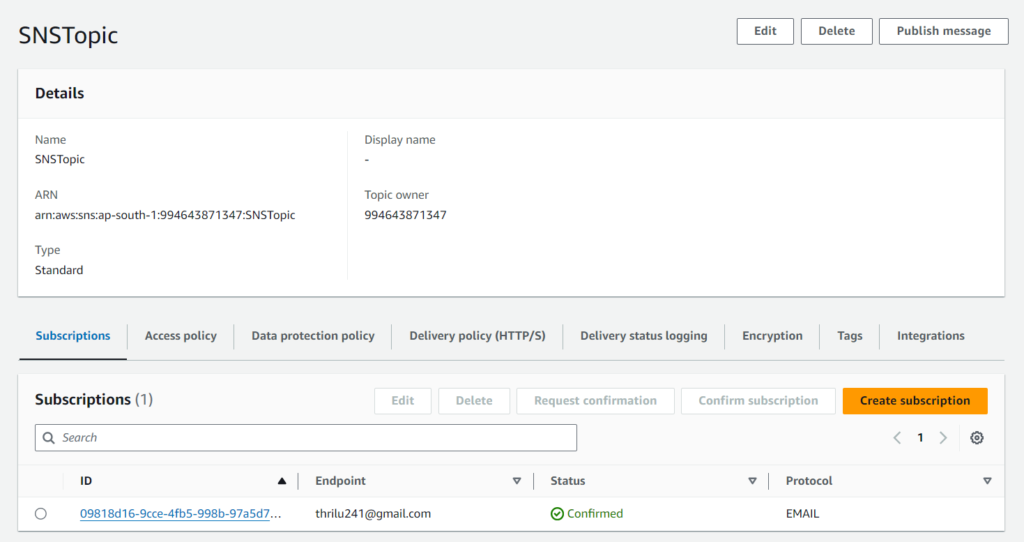
Step 8:The status of the subscription can be viewed on the page below and then Click on “Publish message”.
Once you’ve composed your message, proceed to click on “Publish Message”.

Conclusion
Through SNS, you have the capability to distribute notifications effortlessly to emails, mobile devices, and other AWS services. This dynamic messaging tool streamlines notification delivery, boasting versatility, dependability, and scalability crucial for modern applications.
Also, Read Our blog post on Amazon S3.
What’s Next ?
We’re here to support you! Should you have any questions or need assistance, don’t hesitate to get in touch with us. Contact us at info@uranuscloudsolutions.com and we’ll be happy to help. Your satisfaction is our priority.